

First of all, I want to thank Kathleen for featuring my blog!!!
You must visit her and check out all of the white loveliness!!!
Where there's always a party going on :))
White Wednesday at Faded Charm!!
&
Just a girl for
Show and Share Day
~~~~~~~~~~~~~~~~~~~~~~~~~~~~~~~~~~
I was so excited when I received her email asking my permission!!
UHHHH...... HECK YEAH, LOL!!!
I received it while as we were bouncing through the very deep sand
(in the Land Rover of course!)
in Matagorda, TX where we camped right on the beach!!
Loved it!!
Not loving the sunburn though, lol!!
But again, THANK YOU KATHLEEN :))
You've made my day (and my year)
I am totally honored!!!
THANK YOU... THANK YOU... THANK YOU!!!!
XOXOXOXOXOXOXO
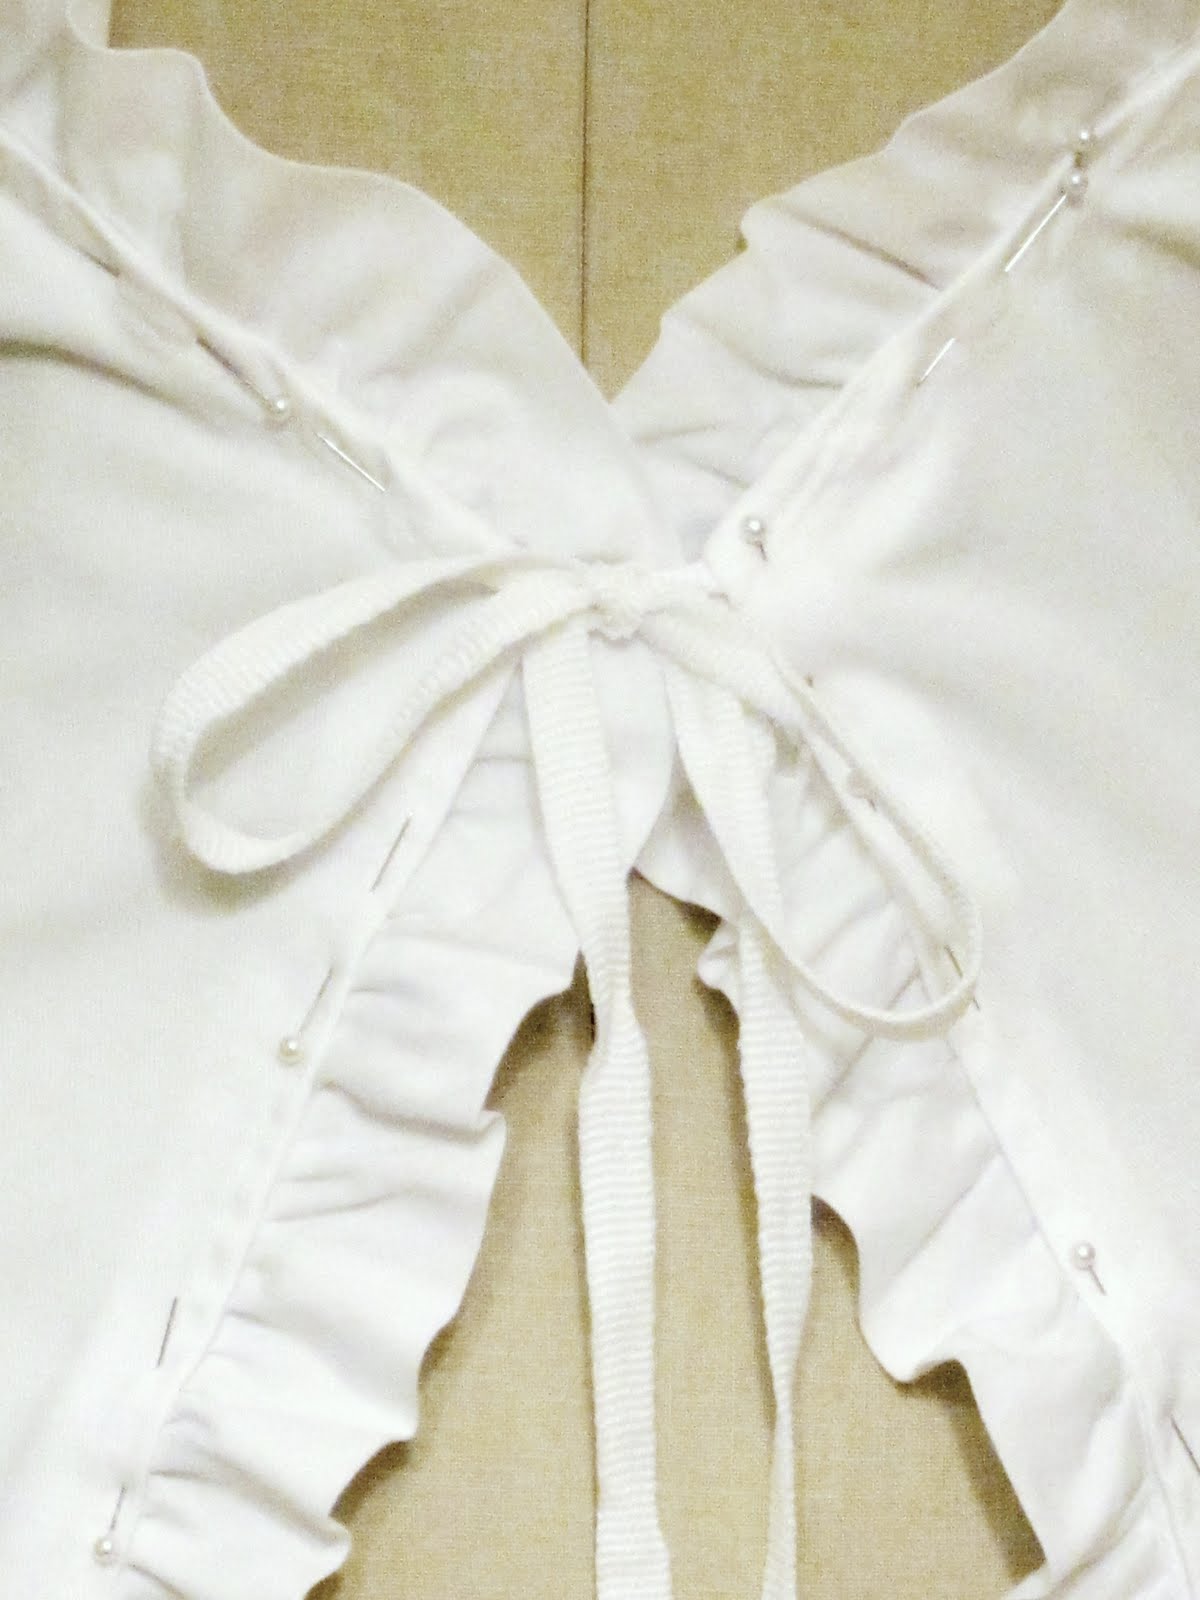
I do love ruffles that is FOR SURE!!
(The aprons will be available for $35.00 plus shipping)
If you're interested in one, just leave a comment
or email me directly at michellamarie@gmail.com
I will be adding more to my Etsy shop so please check back.
It is seriously lacking right now!!
My grandbabies have my full attention at this point in time :))
But if you're interested in anything you see on my blog or
at my booth The Gypsy Caravan, please let me know!!
I will be more than happy to work with you!!
**********************
Ok... (please keep in mind that this is my first tutorial, lol!!)
So please be kind....my heart is a bit fragile :))
~ White Paper Peonies ~
Several ladies have requested a tutorial on how to make them.
So here ya go :))
You don't quite get the contrast with the white ones
as you do the colored ones.
But for pennies to make..... I'll take it!!!!

You can see my post on pink paper peonies here.
With the pink ones I dyed the coffee filters first
and let them dry completely and then proceeded
with the following steps.
Here's what you'll need:
{5} 3" coffee filters
{5} 3-1/4" coffee filters
floral wire {approx. 6" long}
floral tape
scissors
glue {any glue will do}
as you can see, I used wood glue :))
it was the first one I found, lol!!
Ssshhhhhhh!!!
You must visit her and check out all of the white loveliness!!!
Where there's always a party going on :))
White Wednesday at Faded Charm!!
&
Just a girl for
Show and Share Day
~~~~~~~~~~~~~~~~~~~~~~~~~~~~~~~~~~
I was so excited when I received her email asking my permission!!
UHHHH...... HECK YEAH, LOL!!!
I received it while as we were bouncing through the very deep sand
(in the Land Rover of course!)
in Matagorda, TX where we camped right on the beach!!
Loved it!!
Not loving the sunburn though, lol!!
But again, THANK YOU KATHLEEN :))
You've made my day (and my year)
I am totally honored!!!
THANK YOU... THANK YOU... THANK YOU!!!!
XOXOXOXOXOXOXO
I do love ruffles that is FOR SURE!!
(The aprons will be available for $35.00 plus shipping)
If you're interested in one, just leave a comment
or email me directly at michellamarie@gmail.com
I will be adding more to my Etsy shop so please check back.
It is seriously lacking right now!!
My grandbabies have my full attention at this point in time :))
But if you're interested in anything you see on my blog or
at my booth The Gypsy Caravan, please let me know!!
I will be more than happy to work with you!!
**********************
Ok... (please keep in mind that this is my first tutorial, lol!!)
So please be kind....my heart is a bit fragile :))
~ White Paper Peonies ~
Several ladies have requested a tutorial on how to make them.
So here ya go :))
You don't quite get the contrast with the white ones
as you do the colored ones.
But for pennies to make..... I'll take it!!!!

With the pink ones I dyed the coffee filters first
and let them dry completely and then proceeded
with the following steps.
Here's what you'll need:
{5} 3" coffee filters
{5} 3-1/4" coffee filters
floral wire {approx. 6" long}
floral tape
scissors
glue {any glue will do}
as you can see, I used wood glue :))
it was the first one I found, lol!!
Ssshhhhhhh!!!

Here's what you do...
Fold the 3" coffee filters 4 times
(you can do these individually or 2 or 3 at a time)
(1 fold)

(2 fold)

I do have nails by the way!!
I just happened to break my thumb nail off
right up to the part where it really, really hurts
this past weekend while unbuckling the one of the carseats!!!
(3 fold)

(4 fold)

Cut a notch on the inside fold.

Unfold once and cut both sides to round the edges.

Rough up the edges a bit.
I used the end of my scissors.
(I realize now white on white is not the best for tutorials, lol)

Repeat these steps with the 3-1/4" coffee filters.
When you're done, you should have a stack that look like this.

I can fold up and shake in the trash can.
Ok... I try but it usually ends up on the all over me,
the table, the floor and all over the house after my super
helpful grandkids walk through it :))
Okay, now that y'all know I'm not the neatest
coffee filter peony maker,
let's assemble the peony.....
Sorry, I type like I talk and think, lol!!
But I don't say "lol" though :))
I've probably lost some of you here.
Sorry....
Okay.... focus!!
(me, not you)
Fold your floral wire to resemble this.
coffee filter peony maker,
let's assemble the peony.....
Sorry, I type like I talk and think, lol!!
But I don't say "lol" though :))
I've probably lost some of you here.
Sorry....
Okay.... focus!!
(me, not you)
Fold your floral wire to resemble this.

Poke the floral wire through the center
of one of the smaller filters.

Pull it down until it reaches the loop on the wire.
Place a dab (or a glob if you have to make a mess like me :))
of glue on the loop and the filter.

Pull the filter up and around the loop of wire and
pinch all the filter together up and around the wire.
Twist it around the wire.

There ya go!! Ain't it purdy??
Just kidding :))
Keep twisting.

Add another filter.
Pull it up, pinch, and twist.

Add another filter, pull it up, pinch, and twist...
It should begin looking like this.
Well, it's looking kinda like a rose
but today we're calling it a peony :))

When you're done with the 3" filters,
you'll want to wrap them with floral tape
before you start with the larger filters.
Kudos to those out there that make lots of tutorials!!!
It's a lot harder than ya think!!

Ok.... we're wrapping with floral tape.

Pinch and wrap, pinch and wrap...
you want this as tight as you can get it.
You can go all the way down the wire,
but it's not necessary at this point.

Now add the larger filters to the bottom
just like the smaller ones.

Bring it even with the smaller filters on the top.

Pinch and twist the excess around the bottom.

Continue this with the remaining filters.

Pinch and twist, pinch and twist
You're almost done :))
Sounds like an exercise routine, lol!!
After you've added all your filters,
you can wrap it with floral tape.

This time you'll want to wrap it all the way down
to the end of the wire.

Twist and wrap, twist and wrap

Almost there :))

TA DAAAAA :))
I think several bunched together in bags from Tiffany's
would make beautiful centerpieces for a wedding!!


Here are some pictures of real peonies.
Rough up the edges a bit more and add a yellow center
and I think it's pretty darn close :))
What do ya think???

And waaayyy better photography, lol!!

Here's the bracelet my sweetie brought me from
Tiffany's in New York.
A lil' show and tell ;))

(I am not this tan in real life, lol.)
Well y'all....
I hope you enjoyed my very first tutorial!!!
I would love to see them if you make some.
You can post even post them on my Facebook page at
I'M GIVING ANOTHER WHITE RUFFLED APRON
LIKE THIS ONE WHEN I REACH 500 "LIKES" ON FACEBOOK.

And it's not just for cookin' in the kitchen ;))
You can just use it just for display!!!!
~~~~~~~~~~~~~~~~~~~~~~~~~~~~
All you have to do is...
* Become a follower here
* Leave a sweet lil' comment :))* Become a fan of Michella Marie on Facebook
You can even share it on FB or Tweet it if you like!
{But not necessary to be entered}
And by doing this, you'll automatically be entered
for all of my giveaways!!!
This month I am also giving away an apron similar to this!!

Her work is amazing!!!
Find her on Facebook and tell her I sent you over :))
THANK YOU SO MUCH FOR VISITING!!!
HAVE A WONDERFUL DAY!!
LOVE FROM TEXAS!!!!
Michella
xox
I'm also linking up with
Cindy from My Romantic Home for
Leigh at Tales from Bloggeritaville for
at Someday Crafts
at The Shabby Chic Cottage
at Sew Much Ado
at Restore Interiors
Hookin up with House of Hepworths
Blog Hop at Easy Peasy Grandma
Just A Girl for
Show and Share Day
116 comments:
Michella ~
You did awesome on your tutorial!!
Thank you for showing us how to do your beautiful peonies ~
I can't wait to give it a whirl ~
Have a blessed day!
Lori
Sooooo beautiful, Michella. Your first tutorial was incredible. I love it. Thanks for sharing.
Thanks so much for sharing your peony tut! I'm going to give it a try!
Hugs and Blessings,
Rebecca
I love ruffles and your blog.
I made tissue paper pompoms for my daughters graduation party and sprayed painted some purple and they turned out great. I will have to try this with some of the left over tissue paper.
Wow! I was hoping you will do this tutorial and I really really appreciate it. Thank you so much Michella. From coffee filters... I never would have guessed! This is indeed a work of art! I thought you used tissue papers.... but coffee filters... wow! They are so beautiful and I think of endless ways of using them. And your instructions are very organized and easy... loved that as well. Congratulations on being featured... you have a beautiful inspiring blog and I love it! How did you dye them pink? Enjoy your time with your grandbabies. Hugs~Poppy
http://withadashofcolor.blogspot.com/
Thank you for all your super sweet comments!! I cherish each and every one of them!!!
Poppy, you're going to laugh when I tell you how I dyed the pink ones but first I have to tell you that I was visiting my son (who is in the Army and stationed at White Sands Missle Range in New Mexico, basically in the middle of nowhere, lol!!!) so a trip to Hobby Lobby or even Walmart is at the very least a 40 minute drive!
Okay... are you ready for this?? I used Kool-Aid!!! I had to do it, lol!! I didn't have a choice, seriously!! But it worked really well, believe it or not! And it smelled really good too :)) Of course I didn't add the sugar so there are no problems with ants. But when I make more I will probably use either fabric dye (Rite) I think it is or maybe even some food coloring. I'm not sure. I still need to try some different methods to see which ones I like best. The pink ones were my first ones I made. I'm also going to try making some from tissue paper too. I will post more as I make them :)) So stay tuned!!!
And if you make some please share with me your methods!!
You did a great tutorial. I can't wait to make some of these beautiful peonies. Thanks for sharing. Love your blog! Karie
Awesome, I am off to find my coffee filters!!!!
Hugs,
Olivia
You peonies are beautiful and your tutorial was great. It went step by step and showed exactly what to do. Great Job! I look forward to seeing you in Round Top.
giddingslane at gmail dot com
lol! You had me smiling and laughing all the way through your post, Michella! That was a FUN tutorial! lol! Those peonies are so daintily pretty! Great job - and a wonderful idea! I can see I'm going to have to buy extra filters this week.....hehehe!
xoxo laurie
The coffee filter peony is great! And your aprons??? Oh my - - - divine!
I love the peony! I am going to try it! I am a your newest follower and on Facebook as well! THanks for your nice comments!
Everything on your blog is so BEAUTIFUL! Thanks for visiting Two Sides of the Rainbow : )
So pretty! What a fun idea!
What an awesome Idea! Thanks for sharing!
Found ya on Tea Rose Home : )
Come check out my awesome giveaway!
http://dahlingkadie.blogspot.com/2011/06/giveaway.html
Love the peony tutorial! I am a new follower and liked you on fb too I am susan t hahaj on fb. Susan purrpage3 at verizon dot net
Love the tutorial! Can't wait to give it a try myself!!
Thank you for the sweet comment about "my baby"...You are so sweet...we need to get together one day soon...maybe a run to your booth and a quick lunch...Xo, Meme
Beautiful! I love it!
Thanks so much for stopping by Michella and for liking my lavender pots..... I had to read your sentence twice to really absorb.... Kool-Aid...I'll be darned! Wow!I'm now thinking so many color possibilities... baby blue, baby pink, mint green... I thought you dyed with fabric dye but this is even better..I like it with Kool Aid better... less messy.. lol! "necessity mother of Invention indeed! I'm going to try this and when I do all credit will go to you... I love this!Have a wonderful weekend!~Poppy
The peonies look so beautiful! Thank you for the tutorial-I would love to try these.
Thanks for your kind words also.
Have a great weekend,
Carolyn
The flower is so beautiful and you did such a great job with the tutorial! Thank you for sharing your talent with us!
Great tutorial Michella...I am going to totally try this. They are really beautiful and great for decorating:).
Have a lovely Sunday!
~Julia
It is a great tutorial. One of the best I have found. I found you from Tea Rose. I am definitely going to try the Peony, follow your blog and absolutely the Kool Aid dye! LOL! And I love your music choices!
Wow...this is so weird...as I was going to sleep the other night I was thinking about trying to make some peonies from paper...and then I find some here today!! How fun!
These are gorgeous!! And how lovely of you to share a tutorial on them!
I will definitely be trying some of these!
Have a joyful day!
Becky
This is the second time I tried to leave a comment. I really hope it works this time.
I just wanted to say that I am so proud of you I could explode into a giant peony. You have so many talents and this is just the beginning. You are the kindest, sweetest, most loving person I know. Your tutorial is perfect as is everything you do. I love you with all my heart and soul. I am so blessed to have such a fantastic daughter.
Smooches, Mom
Thank you for posting this tutorial!:) I can't wait to try to make these. I am soooo looking forward to more tutorials from you! Thanks for sharing.:) I admire your drive and passion. You are an inspiration to me as I try to sell my 'creations' on etsy and at local artesian shops! Thanks!
First of all, what a fantastic tutorial! The peony is beautiful and I'm definitely going to give this a try. Also, love your blog...I'm now your newest follower. Lesa
I loved your tutorial so much that I just had to make the paper peonies and they were whttp://www.facebook.com/#!/profile.php?id=1025051152onderful! I put the link on my Facebook with the picture of my peonies and gave you the credit for the tutorial! Thank you so much for posting this!
Me again! I made these on the weekend and gave a referral to your tute on my blog post. They are so beautiful...I just love them! Your newest follower here!
Love the peonies!
Thank you for awesome tutorial! They are super easy to make! I decorated baskets with peonies :) Picture is here: http://www.flickr.com/photos/mirynka/6278027550/lightbox/
Thanks for the tutorial! I only had natural coffee filters, but they still look great! I varied the size of the filters (just cutting them smaller as needed) to make my arrangement more diverse, and I didn't use glue or tape (no floral tape). They seem sturdy enough with a good amount of twisting as long as they're left alone.
I loveeeeeer these peonies. Will def make these and also do for a centerpiece for my brothers house. I have some ideas to try with it an will post pics. U have a beautiful website and good job on ur tutorial. Really. I will like u on FB also.
Angelique Soulier ~
I love your version of coffee filter flowers. I'm going to try to make some tonight. Thanks for the inspiration. :)
Thank you soo much Michella! Now I know what I'll be doing as a mini Christmas gift for my beauutifuul mother :)
Im making these tonight!!
These look so real! Can't wait to make them, thanks for sharing!
Debbie in 'Bama
Now, aren't those just soooo darn pretty? LOVE them... I just made pink roses....wouldn't these be perfect with them? Thanks for all your hard work on the tute.
Happy New Year,
Spencer
Love the peonies and enjoy reading your style of writing ... great blog, keep it up!
Thank you ~ got to your spot through Pinterest.....
I am going to try and make these.
This is so cool!!! I know I will be making these....found you through pinterest...and I'm so glad I did....thank you for the tutorial....
I hope mine turn out half as pretty as yours.
Love the tutorial! I am a new follower!
Ihave always wanted to know how to make those,thank you.Ilove tnem
Those are really neat! Curious can you just trim down the same size to get the different sizes?
Can't wait to try these peonies. Think I'll put them on a wreath wrapped in dark blue and hang it in the bathroom. What do you think???
Beautiful. I see these on an arch for a wedding. Much cheaper than buying wedding garlands.
Very pretty. My wedding bouquet was made of vinyl roses, so I have a soft spot for fake flowers.
That tutorial was great! Now can you give a tutorial on how to get the bracelet? lol ;)
Just made the coffee filter peonies and they were SO fun! I added a yellow cupcake liner for that spot of color in the center of the coffee filters. And I trimmed down the second set of coffee filters cause I wasn't drving to town looking for a smaller size..lol..and it worked out fine. Everyone was amazed at the Bday party at how beautiful they were!
Thank you for sharing!
THESE are STUNNING!! And let me say two things...You seem like a tutorial pro and you do NOT look nearly old enough to have grandchildren! ;=)
Will this work with tissue paper, I want my pink?
This is a great tutorial! I am getting married in June and Peonies are not guaranteed to be in season in Ohio. I started making these last night. I stopped at Wal-Mart and bought a couple of leaves/bushes to add to the flowers and they look amazing! Thank you for the tutorial. PS- Your Gypsy Caravan booth looks amazing.
This blog/you are awesome!!! it is so rare to find a blogger that is funny AND talented!!! i am pinning the crap out of this! thank you :)
Thank you for the tutorial. I would had never figured it out by myself. lol I love flowers. :o)
Beautiful!! I'm very new to Pinterest and found you by accident. Loved your tutorial and the end result was A M A Z I N G! I love Peonies. My only complaint was they did not live long enough...well, let's just say you found a cure!! Well done!! Thank you for sharing!
Wonderful tutorial! Thank you from Sugar Land, Tx ;)
I can't wait to try this tutorial. I will be visiting Etsy to see your aprons!!
I love this idea! Very creative. How exactly do you dye the coffee filters? I just now tried to dye the filters BEFORE putting them together. They are drying right now and they have lost all of their ruffles :( i hope they still turn out! I cant wait to try! Thank you so much for the tutorial!
I cannot wait to try! I am not very crafty, but I do try!! :-)
Thank you for posting this lovely tutorial! I will try this soon and will be posting it in my blog. :)
lovelovelove this!
I Really enjoyed your first tutorial on the coffee filtre peonies.I liked your hummor and the fact that you type what you talk and think ,it makes it interesting.great tutorial loooved it :0)
i'm going to try and make some maybe a burgandy colour,i'll send you a pic if I get one made
Adorei o tutorial...Simples mas bem detalhado...Obrigada por compartilhar com a gente...
Loved your flowers...Thanks for the tutorial. (My daughter's name is Michaela Marie - pronounced just like yours and she also loves beautiful things!)
I love the flowers! I am an activities coordinator at a nursing home and I am going to try to make them tomorrow with some of my residents! thank you!!
Thanks for the tutorial! I found you from http://brownpaperpackagesep.blogspot.com/2011/08/pretty-paper-peonies.html on pinterest. I tried it for the first time and here is my finished one- http://pinterest.com/pin/229824387205380194/
Thank you!! I'm going to keep trying to make them better. Not bad for my very first pinterest project ever!
Beautiful! I don't quite get the pinch and twist. Do you add more glue each time? How much do you twist? Also, how would you adapt it if you wanted to make the flowers for a hair clip or headband? Thanks!
Absolutely Beautiful =)
Michella,
I posted my version of your tutorial today, gave you credit,and linked back here :)
http://whitfieldshomeinthecountry.blogspot.com/2012/10/making-paper-peony-tutorial.html#
Thank You!!
Carol
Fantastic and affordable DIY! I love it! I would be honored to feature this on my bridal blog with your permission.
XO. Jannel~The Bridal Assistant.
www.TheBridalAssistant.com
Wow you just brighten my day! I will be sitting in my favorite spot in my craft room and get lost making these flowers. Kinda reminds me of when I was a teenager making tissue paper flowers for my Hippie days!
Your peonies are gorgeous! Can't wait to try making them. Thanks for sharing the tutorial to make it possible.
Why are all the talented gals always from Texas? I am going home from work today and make me some peonies. Maybe try to dye some coffee filters too. A very fun tutorial and love your blog. I will follow you on Facebook. Check me out at Stitchin in the Kitchen on Facebook.
Becky
Wow, they look so incredibly real! Thank you for taking the time to post a tutorial. It was marvelous, dahling!
I just love these peonies and your tutorial was so much fun to read. I thoroughly enjoyed it. I appreciate you!!!
love ~ both the peonies and your tiffany b-dangle :)) thanks for the tutorial!
I can't wait to try the coffee filter peonies! They are truly beautiful!
Lovely! I'm thinking of trying these in my Sunday school class for Mother's day.
I got the warm fuzzier reading this (very well written and helpful!) tutorial. Like talking to a good friend! Please continue to make them, you're very good at it!
Well, I just completed making my first coffee filter flower using your tutorial and it turned out pretty good. I need to make some improvements on the taping but I'll do it. Thanks so much for this great tut - it really was a big help.
I love these. Have to make some soon. Thanks.
I would love to make these for a banquet at church sometime. Much more elegant than the tissue paper ones. thanks and I loved your realistic comments!
Love your tutorial, it explains what you're doing quite nicely, the pictures are great and I love the humor. You seem like a really lovely person! I'm going to show these to my granddaughter and see if she might like to use them for her centerpieces at her reception. Do you happen to know the size of the filters as they appear on the box? I don't think they come by bottom measurement of the filter. I'm wondering also if it might be fun to fold the filters and then just dip the very end of the petals in dye, let them dry and see if you get a variegated color on the petals. Thanks for the lovely tutorial!!!
You did a wonderful tutorial, love your sense of humor you sound just like me LOL. I am going to a grandma for the 2nd time and it is another girl ( I had 3 boys and my youngest is the father to both girls and he blames me for him not havin a son this time cause I had all boys and wanted a daughter.)So I am going to be making these for her shower in june. Thank you so much for posting, love them. And hopefuly mine will turn out like yours Bobbi
You my lady have made an awesome tutorial and I might add awesome awesome peonies that look so real .A one. Job and a pat on the back. Margaret
Can you please tell me you say use a 3 1/4 inch filter and a 3 inch filter . I have Mr Coffee Filters and thay are about 2 1/4 inch so what name brand do I need to get .Thank you very much margaret
Great tutorial! Love those peonies.
Absolutely!! I'm so glad you enjoyed it :))
What beautiful flowers! I shared your blog on my craft blog...http://purplepinwheels.blogspot.com/
Thanks for sharing your tutorial! I know what I'll be doing all weekend. :-)
These are Awesome and a Great tutorial!!! I know how it is - I always sweat stuff like that trying to be perfect :) Grabbing my filters, glue and wire now...:)
Loved the tutorial! I'm gonna make some for my oldest sister... she loves everything that has to do with flowers, plastic, paper or real. She'll take it :)
So thanks for the great tutoria!! :)
Thank you for this tutorial! I just made three,your instructions were great, and the finished product is beautiful.
Nice and wonderful , i really do appreciate your kind gesture sharing this information, thanks for this.
Thanks so much for your tutorial. I loved it, along with your sense of humor! I liked that you didn't skip any of the simple steps. I'm new to all of this and would have been sitting there saying, oh no, now what do I do? Keep up the great work! :-)
Cathy
First time stopping by your Blog, and I loved it! The tutorial for the peonies was very easy to follow, for your first time I think you did an excellent job. Looking forward to following your post ~ and Thank you ~ Becky G
I am so glad I found your blog.I love everything I have seen and your peonies are to die for.How clever are you?
I love your tutorial,it's easy and simple and turned out amazingly beautiful.I would like to try this at home sometime.I just join your site and follow you hope you follow me back on http//:bowsbyrose.blogspot.com,thank you have a nice day!
What a great tutorial and was inspired to make them right away. I didnt have any florist wire or tape so i improvised by using pipe cleaners and scotch tape. Believe it or not they turned out just as pretty. Also i think that i may dye some filters next time in pretty springtime colours. I love using coffee filters in crafts. I have made several coffee filter wreaths and was excited to see your tutorial on something else. I will definately be using these in my mothers day flower arrangement im making for my mom. Thanks for the fun and cant wait to see more from you. Lisa Brooks
What a fun and beautiful project! And a tutorial that was fun to read!!! Gonna try this one with my "helper"! My granddaughter Arya is 4 and would love this lil beauty!
Thank You Michella! Your Tutorial was Fantastic and Fun! Felt like You were right here with me. I can't wait to make these! Maybe I'll have better luck making them than I did trying to grow them lol This made my night. Thanks Again! : )
Would never guess this is your first tutorial, wonderful! I'm going to try these with my friends on our next craft night.
I am going to try these. My hubby wants another wedding....seems like one every ten years is going to be his pace. He loves weddings, well getting married to me at least. This will be number three so I am looking for pretty and budget friendly, this will be perfect. April wedding so I have time to start these now!
What an INSPIRATION you are, not only in your amazing crafts but in your ATTITUDE. I'm hooked, thanks for sharing.
Ann
Very pretty! I've made wreaths out of coffee filters before and they turned out beautiful. I even gave a few away for Christmas! I wonder what this would look like if you started with one singular yellow piece of tissue paper in the center to give the illusion of the yellow pollen in the center of the real flower? I may have to try that now... Lol! Thanks for the tutorial, I plan on making these as Christmas gift toppers and brushing on a bit of glitter to the finished product.
I love this idea. I grow peonies and it is really close to the real ones. No watering needed on these.
At Christmas I made paper angels for our church Christmas tree and the little children joined in on fellowship night and made several also. They were made out of coffee filters also.
Opal from SE Kansas and love the aprons
I made a paper peony and it turned out beautiful as my first one. I put it in a mason jar with a small flameless candle in the bottom and tied a yellow ribbon around the jar. Beautiful, just beautiful. I think they'd also be beautiful to make white ones and using white tape and tape the wire onto white candy sticks to use in vases. Thanks for the great tutorial and tips.
Ravonda in NC
You did wonderful perfect
Thank you so much for the tutorial on the peonies. I will be making a few for one of my best friends first anniversary. I know she will love them!
I love your peonies and am going to try them soon.Know exactly what you mean about the grandkids...I have 3 greatgrandones and do love them to death but there arent enuf hrs. In a day to follow them around to pick up after.thanks again and I will work on a peonie or 2.
Peonies are one of my favorite flowers, too short of a life, but this way of paper flowers will work for me, looks fantastic!
I have tried so many different tutorials on coffee filter flowers, and this is the only one I have had success with. My flowers came out beautiful.. … Everyone loves them. Thank you so much!!!!
Post a Comment